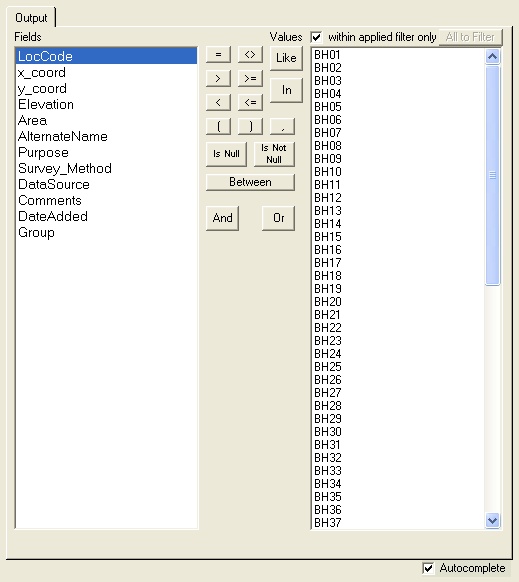
The filter is presented in the format shown below. The filter is automatically constructed into a form of pseudo-english in the form of SQL (Structured Query Language) which is use to extract the desired information. In the case below we wish to obtain data collected in the lower aquifer, where the purpose is leachate monitoring.
MonitoringUnit = 'Lower Aquifer' AND
Purpose = 'Leachate Monitoring' |
The filter uses the following concepts:
•A double click on a value in the data panel adds the selected data to the filter. Double Clicking on the same value/point again applies the filter
•A click on a point on the map and clicking ![]() “Send selected Locations to Filter and deselect” adds the selected data to the filter.
“Send selected Locations to Filter and deselect” adds the selected data to the filter.
•Multiple points can be selected from the map by dragging a square or circle around them
•More sophisticated filters can be constructed using the "Filter" tab,
•Advanced users can manually edit the filters and use the pre-output filter.

To create an expression,
•double-click the field you want to use (left column),
•click an operator, then
•double-click the value (right column).
or
•click once on the field you want to use (left column)
•double click on a value (right column), which will automatically assign the Field and “=” operator.
Allows filtering at one level higher than the current processing. This output is not available for SQL Server versions (due to security associated with the data tables).
It's usage is generally considered advanced, for users who are familiar with concepts from using Access.

Filter No.(1,2,3) Each filter number stores a separate filter in the filter box. This way you can temporarily store a filter while applying an alternative.
![]() Filter Save. Allows you to save the applied filter.
Filter Save. Allows you to save the applied filter.
![]() Filter Information Copy. Copies current information about the source of the data, such as the source of the information, the filter, whether the data is the result of the summary, and the date. Information can be pasted into any application.
Filter Information Copy. Copies current information about the source of the data, such as the source of the information, the filter, whether the data is the result of the summary, and the date. Information can be pasted into any application.